Quick Start: Multi-Location & Wholesale
Enterprise setup guide — multi-location, wholesale portal, staff scheduling, and AI agents.
What you'll learn
- How to set up multiple bakery locations in BakeOnyx
- How to create a wholesale portal for bulk customers
- How to manage staff schedules and track labor costs across locations
Setting up multiple locations
If you're running more than one bakery location, BakeOnyx lets you manage them all from one dashboard. Each location has its own orders, inventory, and schedules, but you share recipes and products across all locations.
- Go to Dashboard and select Settings
- Click Locations from the left menu
- Click the + Add Location button
- Enter your location name (e.g., "Downtown Bakery" or "Airport Kiosk")
- Add the full address and phone number
- Set operating hours for each day of the week
- Click Save Location
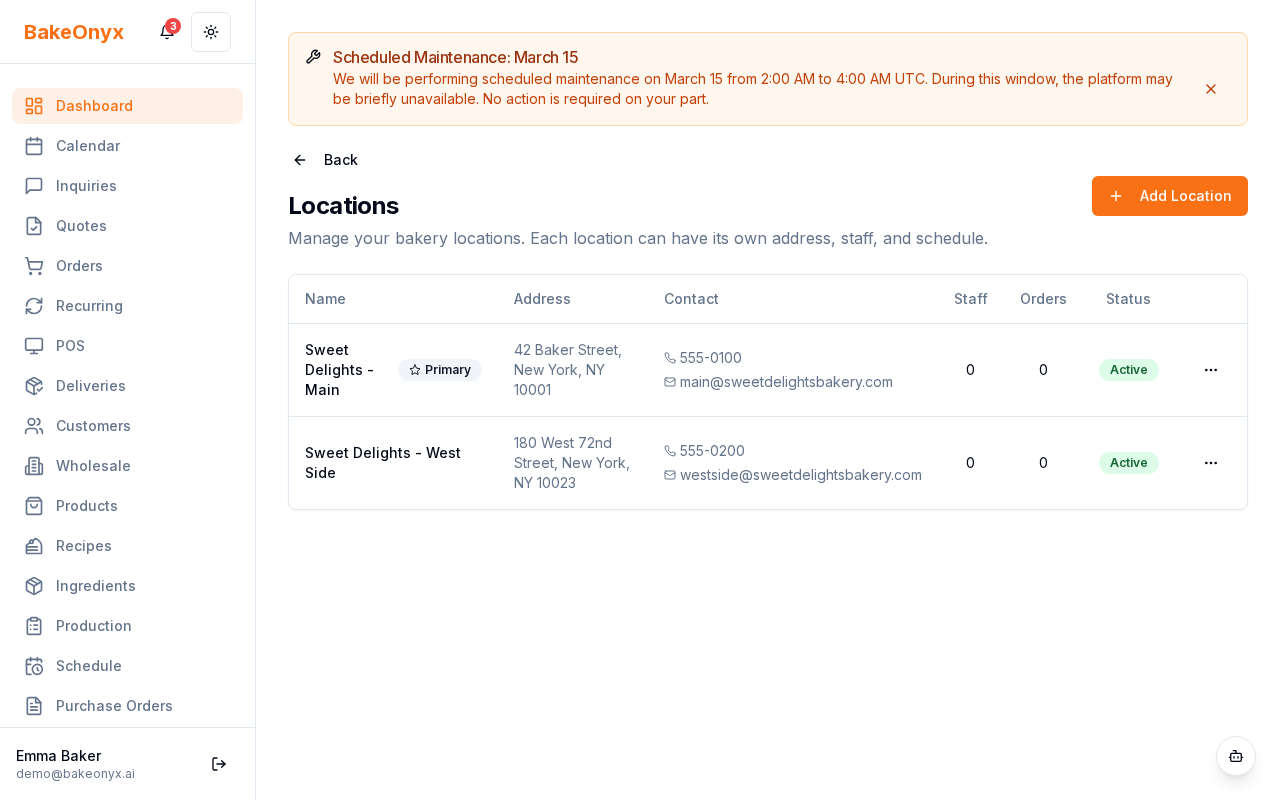
Once you've added all your locations, you'll see a location switcher at the top of your dashboard. Use it to jump between locations and view location-specific data like orders, inventory, and staff schedules.
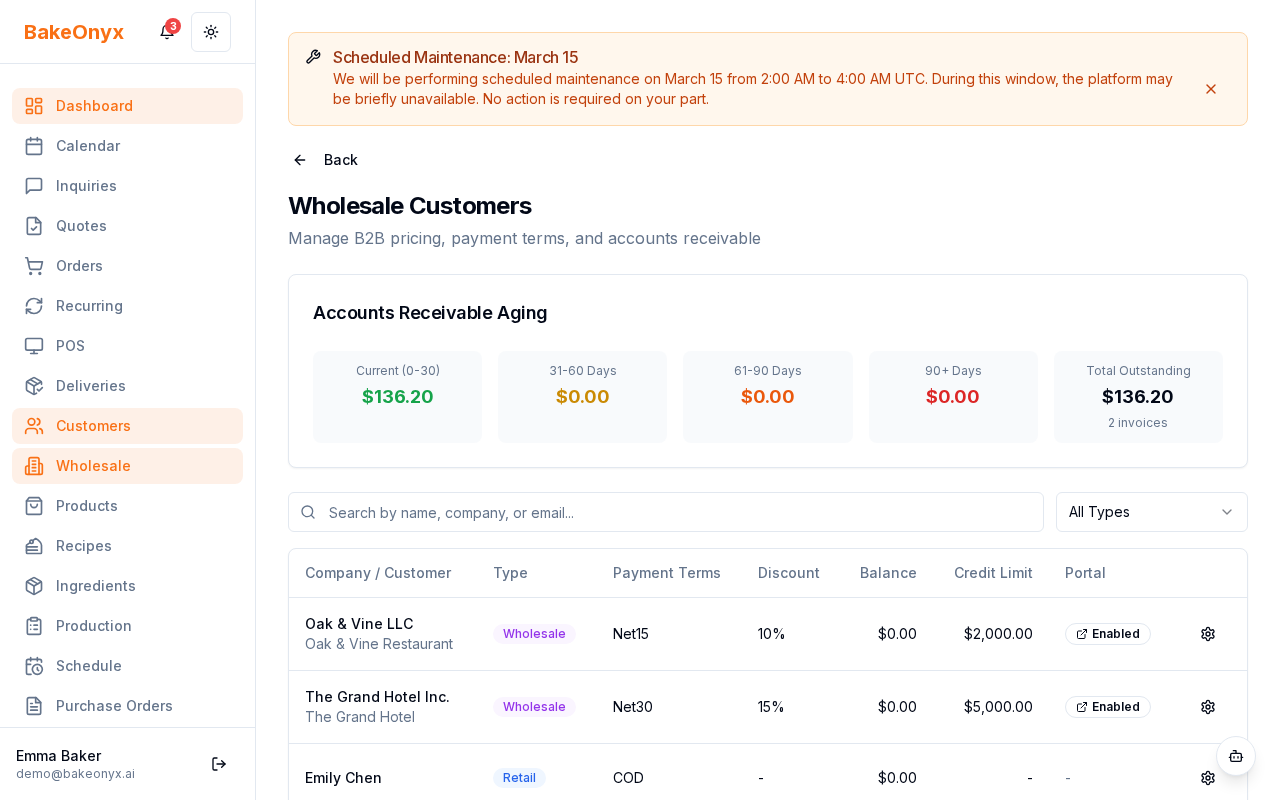
Creating a wholesale portal
Wholesale customers can place bulk orders directly through their own portal instead of emailing or calling. You control pricing for each wholesale customer.
- Go to Dashboard and select Customers
- Click + Add Customer
- Enter the business name and contact information
- Toggle Wholesale Account to ON
- Set a custom price tier for this customer (or use volume-based pricing)
- Click Create Wholesale Account
Your wholesale customer will receive a login link via email. They can now log into their portal, browse your products, and place orders at their custom pricing.
Managing staff schedules
Use the scheduling tool to create shifts, manage staff availability, and track labor costs by location.
- Go to Dashboard and select Schedule
- Select the location and week you want to schedule
- Click + Add Shift for any day
- Choose the staff member, start time, end time, and role (baker, decorator, cashier, etc.)
- Enter the hourly rate for that shift
- Click Save Shift
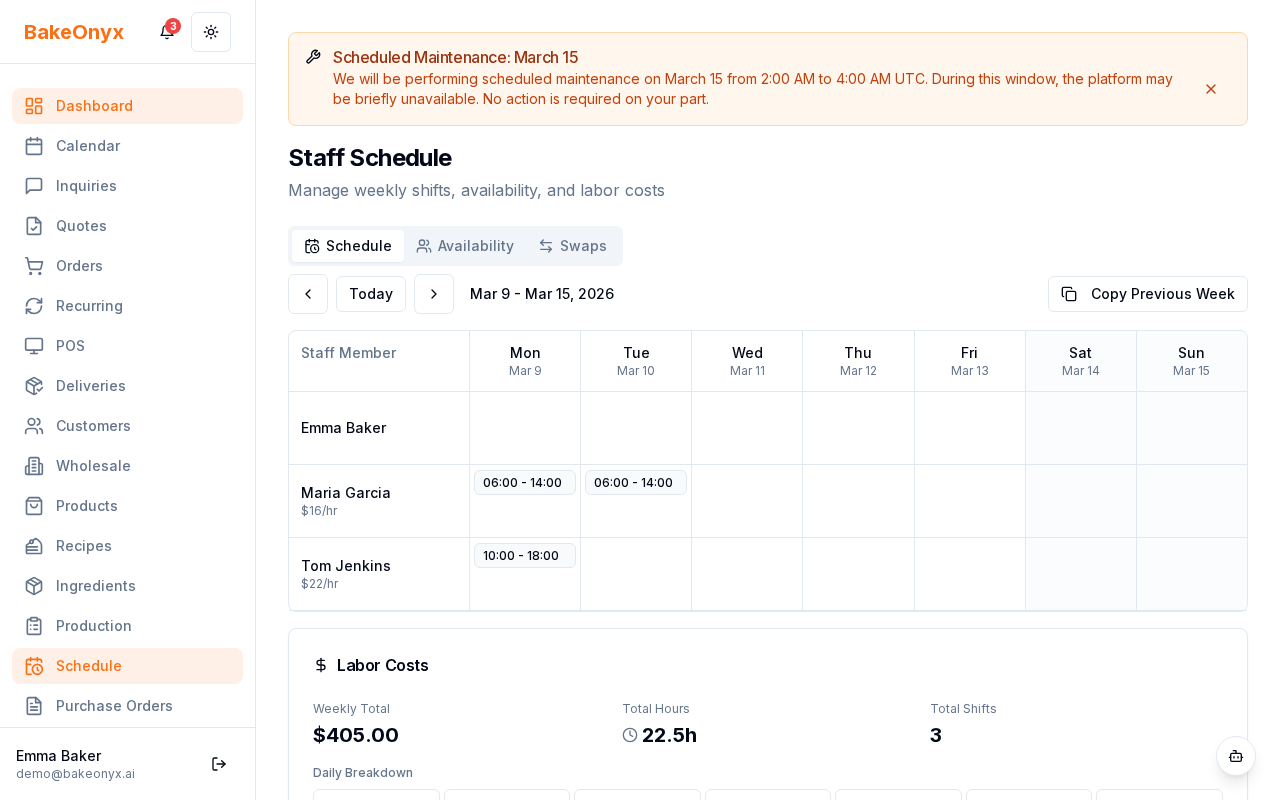
Staff members can request shift swaps through the app. You'll see swap requests in your dashboard and can approve or deny them. Labor costs are automatically calculated and shown in your reports.
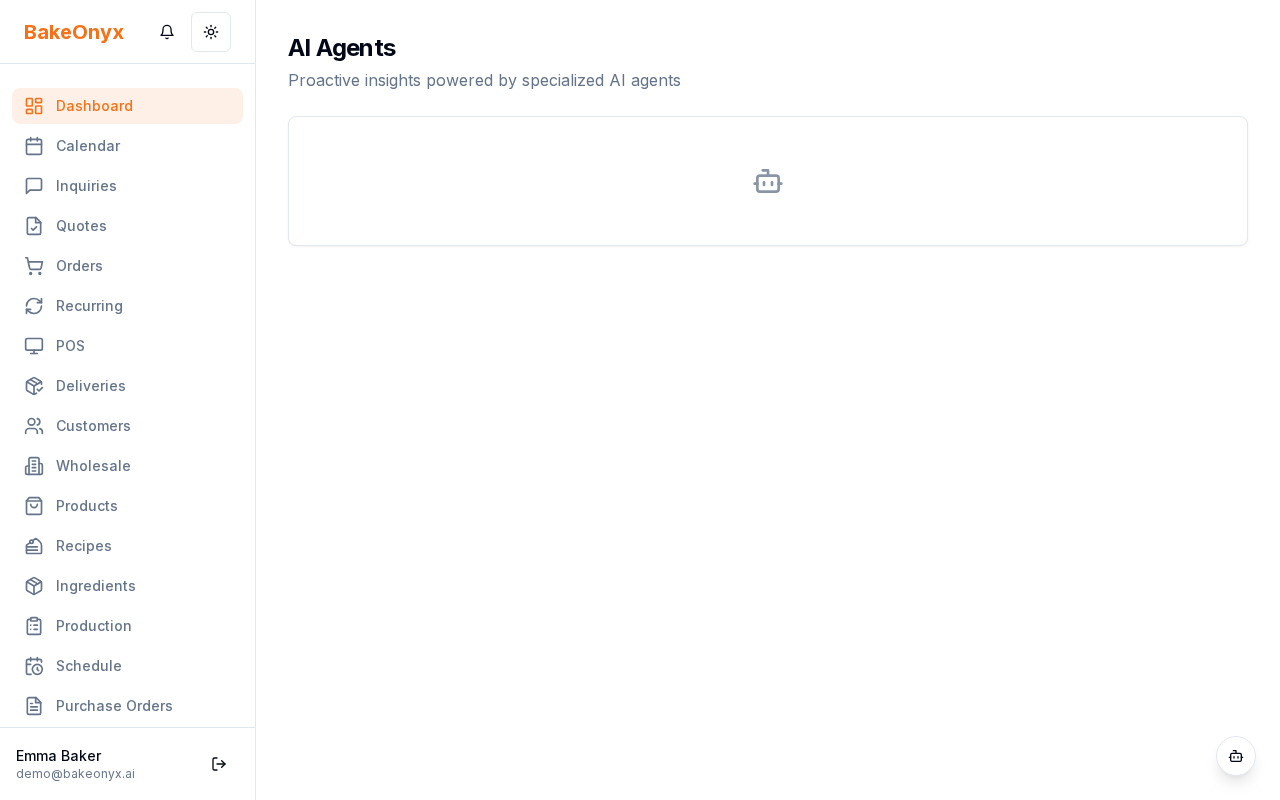
Using AI agents (Scale plan)
If you're on the Scale plan, you can turn on AI agents to automate routine tasks like inventory monitoring, financial analysis, and demand forecasting.
- Go to Dashboard and select AI Agents
- Toggle each agent ON to activate it (Inventory Monitor, Financial Analyst, Production Optimizer, Marketing Insights)
- Set a schedule for each agent (daily, weekly, or custom)
- Agents will run automatically and send you reports and alerts
Next steps
- Your First 30 Days Checklist — a full onboarding roadmap for new users
- Creating a New Order — learn how to process orders from customers and wholesale accounts
- Creating a Recipe — set up your products once and use them across all locations
The summary, FAQ, and statistics in this section were compiled from public sources and reviewed by the BakeOnyx editorial team. AI-assisted research.
Frequently Asked Questions
How do I add a new bakery location in BakeOnyx?▾
To add a new location in BakeOnyx, navigate to Dashboard > Settings > Locations. Click the '+ Add Location' button, then enter the location name, full address, phone number, and daily operating hours. Once saved, a location switcher will appear on your dashboard, allowing you to easily toggle between managing different branches.
Can I set different prices for my wholesale customers?▾
Yes, BakeOnyx allows you to set custom pricing for each wholesale customer. When creating a wholesale account, you can assign a specific price tier or utilize volume-based pricing. This ensures that wholesale clients see their accurate, negotiated prices when they log into their dedicated portal to place bulk orders.
How does BakeOnyx help manage staff across multiple bakeries?▾
BakeOnyx's scheduling tool enables you to manage staff across multiple locations efficiently. You can create shifts, assign staff members, set start and end times, specify roles, and input hourly rates for each shift. The platform helps track labor costs separately for each location, providing clear insights into staffing expenses.
What information is shared across all bakery locations in BakeOnyx?▾
In BakeOnyx, recipes and products are shared across all your bakery locations. This means you only need to create and manage them once. However, inventory levels, incoming orders, and staff schedules are tracked independently for each individual location, providing granular control and visibility.
How do wholesale customers place orders using BakeOnyx?▾
Wholesale customers can place orders through a dedicated portal provided by BakeOnyx. After you create their wholesale account and set their custom pricing, they receive an email with a login link. They can then log in, view available products at their specific prices, and submit bulk orders directly, streamlining the process for both parties.