Setting Up Your Bakery Profile
Configure your bakery name, address, logo, timezone, currency, and business details.
Setting Up Your Bakery Profile
What you'll learn
- How to enter your bakery's basic information (name, address, contact details)
- How to upload your bakery logo and set your timezone and currency
- Why accurate profile setup matters for orders, invoices, and customer communications
Getting to your bakery profile
Your bakery profile is where BakeOnyx stores all the core information about your business. This is the first step in getting your bakery ready to use the platform.
- Log in to BakeOnyx and go to your Dashboard
- Click the Settings icon (gear icon) in the top right corner
- Select Business from the left menu
You'll now see the Business Profile form where you can add and update your bakery details.
Filling in your bakery information
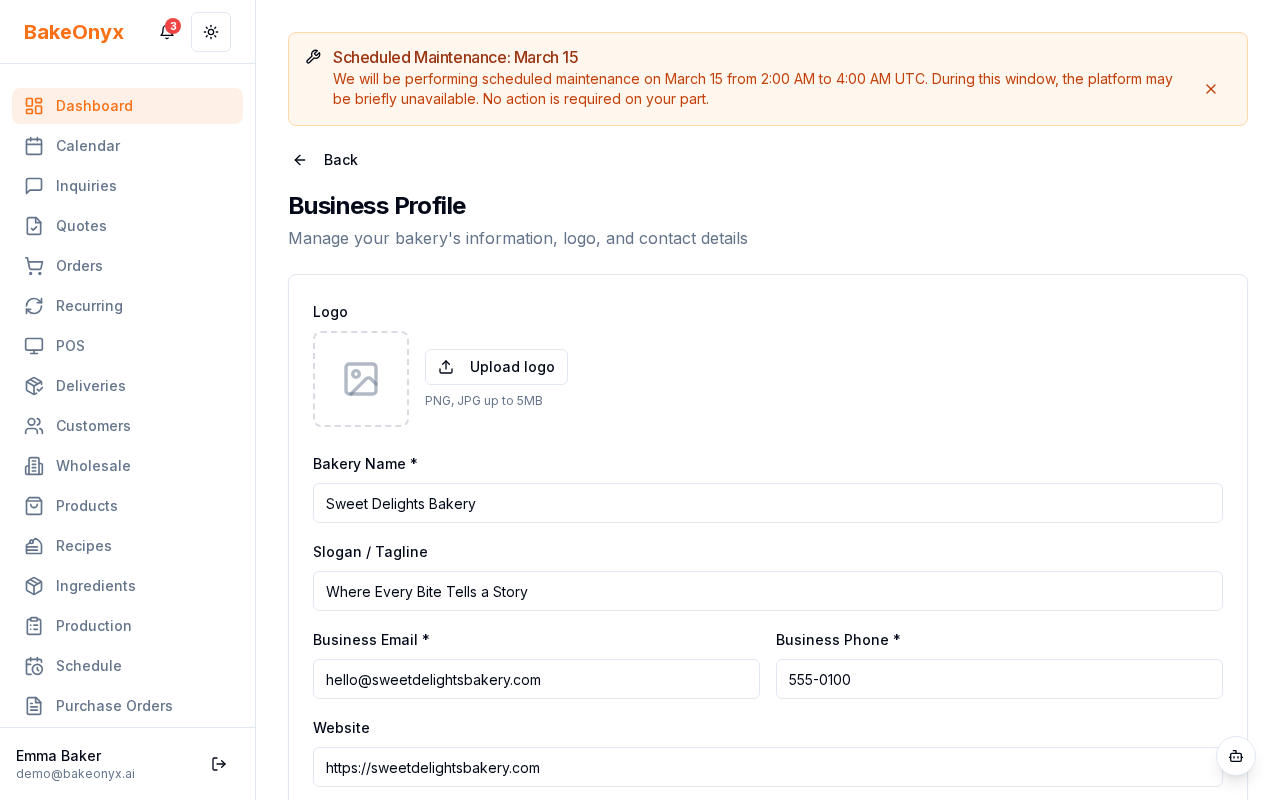
Complete the following fields to set up your profile:
Basic details
- Bakery Name — Enter the name of your bakery as you want it to appear on invoices, receipts, and customer communications
- Phone Number — Add your main contact phone number
- Email Address — Enter the email address customers and team members will use to reach you
Address
- Street Address — Enter your bakery's physical address
- City — Enter your city
- State/Province — Select or type your state or province
- Postal Code — Enter your postal or ZIP code
- Country — Select your country from the dropdown
Logo upload
- Click the Upload Logo button
- Select an image file from your computer (PNG or JPG works best)
- Your logo will appear on invoices, receipts, and customer-facing documents
Setting your timezone and currency
These settings ensure that order times, delivery dates, and pricing display correctly for your team and customers.
Timezone
- Find the Timezone dropdown
- Search for your timezone or select it from the list (for example, "Eastern Time (US & Canada)")
- This timezone will be used for all order timestamps and delivery schedules in BakeOnyx
Currency
- Find the Currency dropdown
- Select your currency (for example, USD, CAD, EUR, GBP)
- All prices, invoices, and reports will display in this currency
Saving your profile
- Review all the information you've entered
- Click the Save Changes button at the bottom of the form
- You'll see a confirmation message that your profile has been updated
Your bakery profile is now set up! You can return to this page anytime to update your information.
Next steps
Now that your bakery profile is configured, you're ready to:
- Complete the full onboarding walkthrough to set up the rest of your bakery
- Create your first order to start taking customer orders
- Create recipes to track ingredients and production costs
The summary, FAQ, and statistics in this section were compiled from public sources and reviewed by the BakeOnyx editorial team. AI-assisted research.
Frequently Asked Questions
Where do I find the bakery profile settings in BakeOnyx?▾
To access your bakery profile settings, first log in to your BakeOnyx account and navigate to your Dashboard. From there, click the gear icon (Settings) located in the top right corner of the screen. Then, select 'Business' from the menu on the left-hand side. This will take you to the Business Profile form.
What information is needed to set up my bakery profile?▾
To set up your bakery profile, you'll need to provide your bakery's name, phone number, and email address. You also need to enter your full street address, city, state/province, postal code, and country. Uploading your bakery logo is also recommended for professional branding on documents.
Why is setting the correct timezone and currency important in BakeOnyx?▾
Setting the correct timezone and currency in BakeOnyx is vital for accurate order management and financial reporting. The timezone ensures that order timestamps and delivery schedules are displayed correctly for your team and customers. The currency setting dictates how all prices, invoices, and financial reports are presented.
Can I change my bakery's timezone or currency after I've started using BakeOnyx?▾
While you can change your timezone and currency settings, it's advisable to set them correctly from the beginning. Modifying these settings after creating orders may impact how historical data is displayed and interpreted within the BakeOnyx platform. It's best to confirm these details before significant data entry.
What are the recommended specifications for uploading a bakery logo to BakeOnyx?▾
For the best appearance on invoices, receipts, and customer-facing documents within BakeOnyx, it's recommended to use a square logo with a 1:1 ratio. A minimum size of 200x200 pixels is suggested. PNG or JPG file formats are compatible. You can skip this step initially and add your logo later.