Onboarding Walkthrough
Walk through the 5-step onboarding wizard that gets your bakery set up and ready to go.
Onboarding Walkthrough
When you first log into BakeOnyx, you'll be guided through a 5-step setup wizard. This walkthrough ensures your bakery is configured correctly so you can start managing orders, recipes, and costs right away.
- Complete your bakery's business profile and basic settings
- Configure tax rates and overhead costs specific to your region
- Set up order defaults like numbering format and payment terms
Getting Started with Onboarding
The onboarding wizard appears automatically when you log in for the first time. You'll see a progress checklist on the left side of your screen showing all 5 steps. Each completed step displays a checkmark, so you can track your progress at a glance.
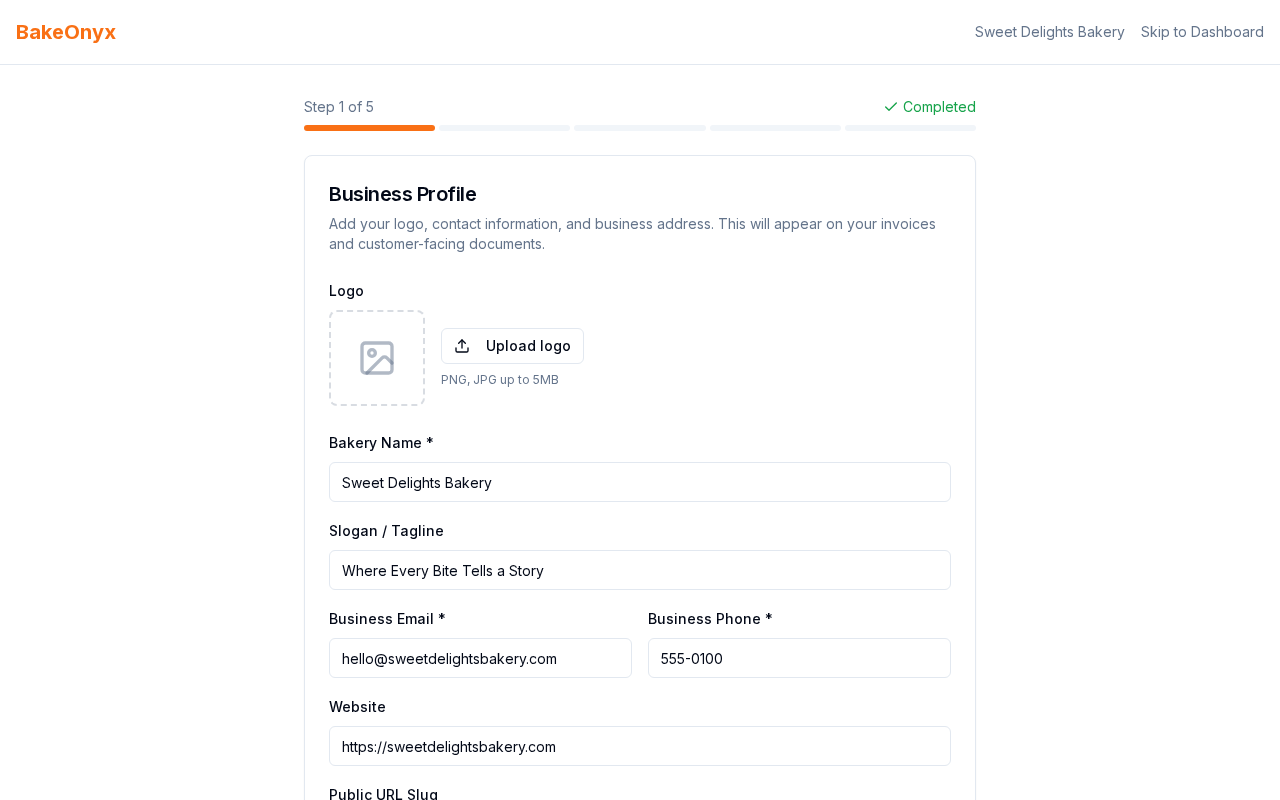
Step 1: Business Profile
Start by telling BakeOnyx about your bakery.
- Enter your Bakery Name — this is how it will appear on orders and invoices
- Upload your Logo (optional, but recommended for professional invoices)
- Enter your Address — street, city, state, and postal code
- Select your Timezone from the dropdown — this ensures order times are recorded correctly
- Choose your Currency (USD, EUR, GBP, etc.) — you can't change this later, so choose carefully
- Click Next to proceed
Step 2: General Settings
Configure the financial defaults for your bakery.
- Set your Labour Rate — the hourly cost of labour (used to calculate recipe costs)
- Enter your Default Markup — the percentage markup applied to recipe costs when creating orders (e.g., 40% markup)
- Choose your Overhead Allocation Method — select how overhead costs are distributed across orders (by recipe weight, labour time, or fixed amount)
- Click Next
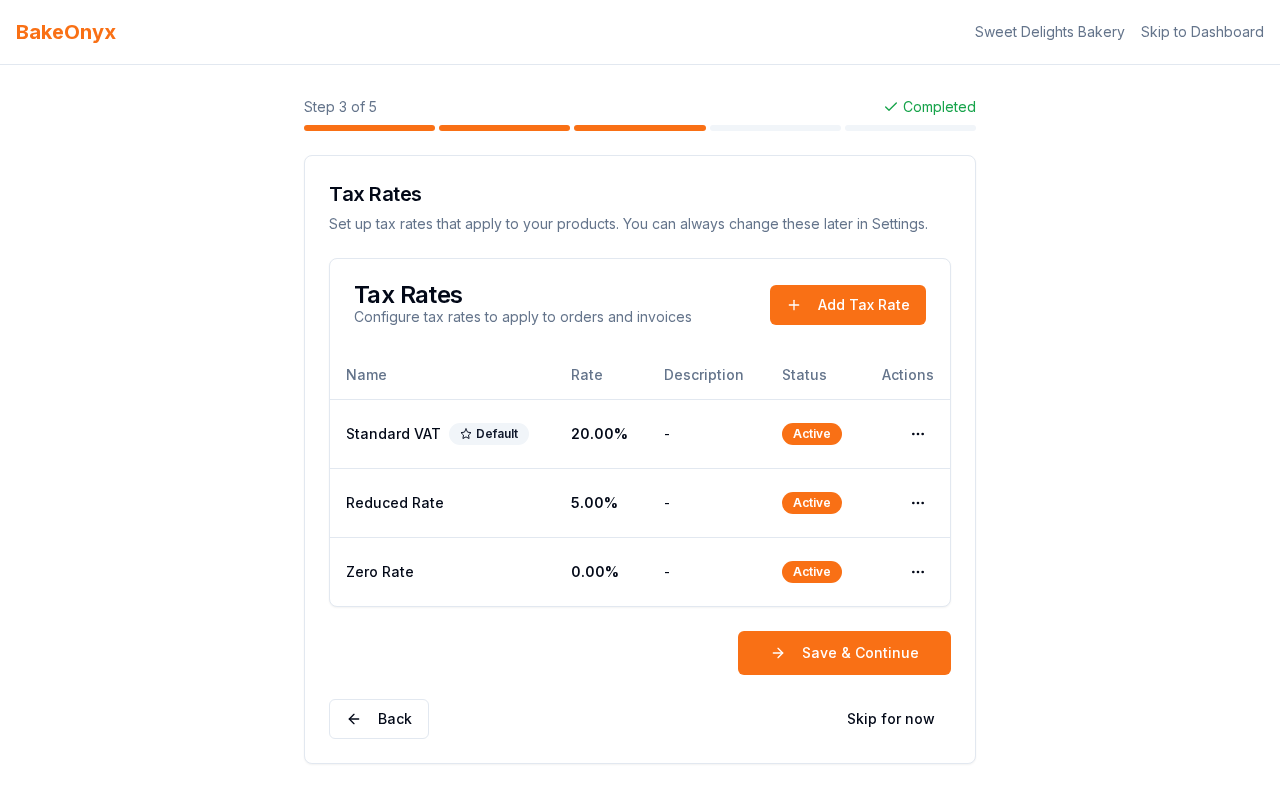
Step 3: Tax Rates
Set up tax rates based on your region and business type.
- Enter your Default Tax Rate — the standard sales tax or VAT for your area
- Add any Additional Tax Rates if your region has different rates for different product types (e.g., prepared foods vs. wholesale)
- Click Next
Step 4: Overhead Costs
Add your monthly overhead expenses so BakeOnyx can factor them into your pricing and profitability.
- Review the list of common overhead categories (rent, utilities, insurance, etc.)
- Enter the Monthly Cost for each item that applies to your bakery
- Add custom overhead items if needed by clicking Add New Item
- Click Next
Step 5: Order Settings
Finalize how orders will be numbered and tracked.
- Choose your Order Numbering Format — decide if orders are numbered sequentially (001, 002, 003) or by date (ORD-20250115-001)
- Set your Default Tax Rate for Orders — this applies to new orders unless you override it
- Select your Default Payment Terms — choose from options like "Due on Receipt," "Net 7," "Net 14," or "Net 30"
- Click Complete to finish onboarding
Once you click Complete, you'll have full access to your BakeOnyx dashboard and can start creating orders and recipes.
What's Next?
Congratulations! Your bakery is now set up in BakeOnyx. Here's what to do next:
- Explore your dashboard to familiarize yourself with the main features
- Create your first recipe so you can build orders with accurate costs
- Create your first order to see how everything works together
The summary, FAQ, and statistics in this section were compiled from public sources and reviewed by the BakeOnyx editorial team. AI-assisted research.
Frequently Asked Questions
How do I start the BakeOnyx onboarding process?▾
The BakeOnyx onboarding wizard automatically appears the first time you log into your account. It features a progress checklist on the left side of the screen, displaying all five steps. Each completed step is marked with a checkmark, allowing you to easily track your setup progress.
Can I skip steps during the BakeOnyx onboarding?▾
Yes, you can skip any or all steps during the BakeOnyx onboarding process if you need to set things up later. You can easily return to finish the onboarding at any time directly from your BakeOnyx dashboard. All steps are accessible even after initial setup.
What information is needed for the Business Profile step in BakeOnyx?▾
In the Business Profile step of BakeOnyx, you'll enter your Bakery Name, upload your Logo (optional), provide your Address, select your Timezone, and choose your Currency. The currency selection is permanent, so choose carefully. This information appears on orders and invoices.
How does BakeOnyx use my overhead costs?▾
BakeOnyx uses your monthly overhead expenses to calculate the true cost of each order and assess your overall profitability. You'll input costs for common categories like rent and utilities, and can add custom items. Accurate overhead data ensures precise pricing and financial insights.
Can I change the currency or labour rate after completing BakeOnyx onboarding?▾
The currency selected during the BakeOnyx onboarding process cannot be changed later. However, you can adjust your Labour Rate, Default Markup, and Overhead Allocation Method at any time from your general settings, even after completing the initial setup. These can also be adjusted per order.