Managing Storefront Products
Choose which products appear on your online store and customize their presentation.
Managing Storefront Products
Your online storefront is your digital bakery window. In BakeOnyx, you control exactly which products customers see, how they're described, and what ordering rules apply. This guide walks you through setting up and managing your storefront product catalog.

What you'll learn
- How to show or hide products from your online store
- How to customize product descriptions and images for customers
- How to set ordering requirements like minimum quantities and lead times
Accessing Your Storefront Products
- Log in to BakeOnyx and go to your Dashboard
- Click Storefront in the left menu
- Select Products
You'll see a list of all your products. This is where you control what appears on your public online store.
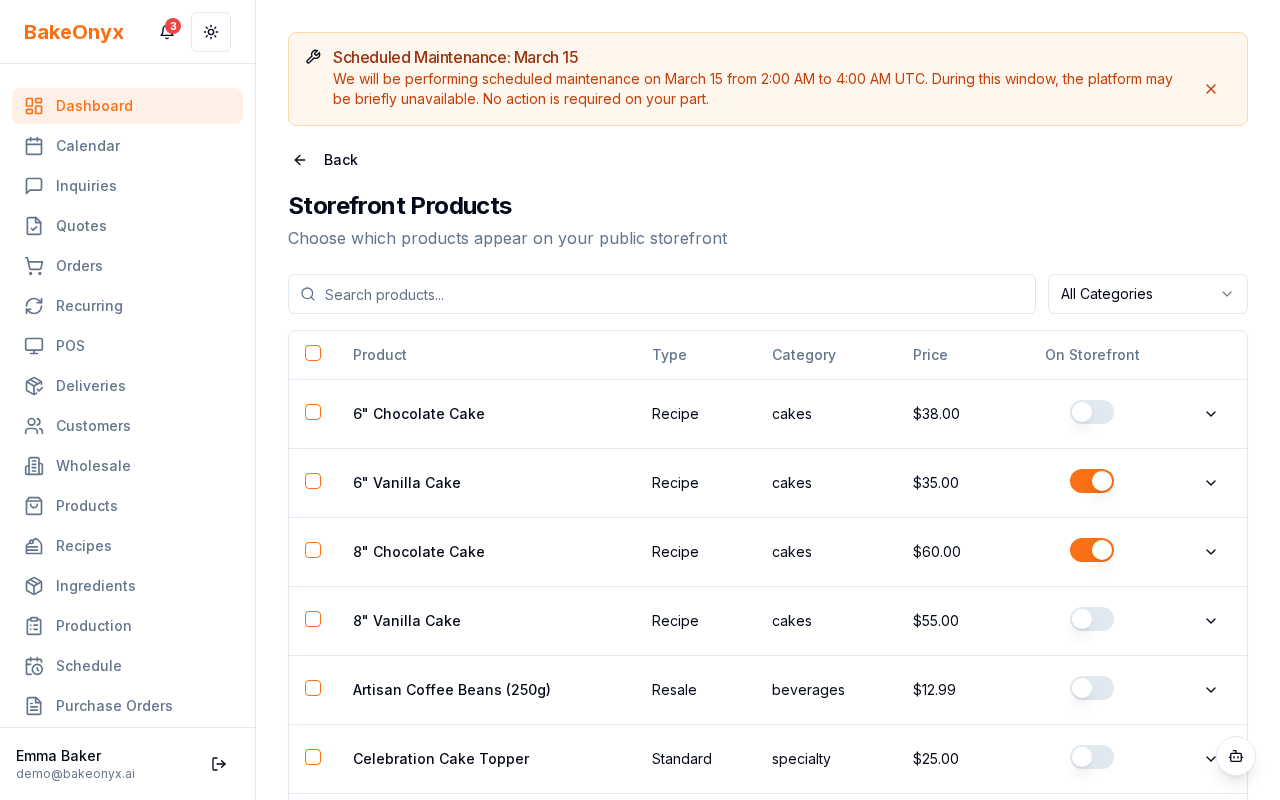
Showing or Hiding Products
Not every product needs to be available online. You might want to reserve certain items for in-person orders or seasonal specials.
- Find the product you want to manage in the list
- Look for the Show on Storefront toggle switch
- Click the toggle to turn it on (blue) to display the product, or off (gray) to hide it
- Changes save automatically
Customizing Product Descriptions for Customers
Your storefront description is what customers read when browsing your shop. Keep it friendly, appetizing, and focused on what makes your product special.
- Click on the product you want to edit
- Scroll to the Storefront Description field
- Enter customer-friendly text (this is separate from your internal product notes)
- Include details like ingredients, dietary info, or special features
- Click Save
Adding Product Images
Great photos help customers decide. You can upload multiple images for each product to create a gallery on your storefront.
- Open the product you want to update
- Find the Product Images section
- Click Add Image or the upload button
- Select a photo from your computer
- Repeat to add multiple images
- Drag images to reorder them (the first image appears as the main photo)
- Click Save
Setting Ordering Requirements
Control how customers order by setting minimum quantities and advance notice requirements.
Lead Time (Advance Notice)
Lead time tells customers how many days in advance they must place an order. This is useful for custom cakes or specialty items that need prep time.
- Open the product
- Find the Lead Time Days field
- Enter the number of days (for example,
3means customers must order at least 3 days ahead) - Save your changes
Minimum Order Quantity
Set a minimum quantity if you don't want customers ordering just one item.
- Open the product
- Find the Minimum Order Quantity field
- Enter the smallest quantity you'll accept (for example,
6for a half-dozen cookies) - Save your changes
Controlling Display Order
Products appear on your storefront in the order you set. You can arrange them by category, popularity, or however makes sense for your bakery.
- Open the product
- Find the Storefront Sort Order field
- Enter a number (lower numbers appear first)
- Save your changes
For example, you might set your bestsellers to 1-10, seasonal items to 11-20, and specialty orders to 21+.
Next Steps
- Online Checkout and Customer Accounts — Learn how customers place orders on your storefront
- Creating a New Order — Create orders manually for phone or in-person customers
- Managing Customers — Track and organize your customer information
The summary, FAQ, and statistics in this section were compiled from public sources and reviewed by the BakeOnyx editorial team. AI-assisted research.
Frequently Asked Questions
How do I make a product visible or invisible on my BakeOnyx online store?▾
To control product visibility in BakeOnyx, navigate to the 'Storefront' section and then 'Products'. For each item, you'll find a 'Show on Storefront' toggle. Clicking this toggle to 'on' (blue) will display the product on your public shop page, while clicking it to 'off' (gray) will hide it. Changes are saved automatically.
Can I add special instructions or details to my product listings for customers?▾
Yes, BakeOnyx enables you to create customer-friendly descriptions separate from internal notes. When editing a product, find the 'Storefront Description' field. Use this space to highlight ingredients, dietary information, unique selling points, or serving suggestions that will entice customers and provide them with key details about your offerings.
How do I set up advance notice requirements for certain bakery items using BakeOnyx?▾
For products requiring preparation time, such as custom cakes, you can set a lead time. Within the product editing screen in BakeOnyx, locate the 'Lead Time Days' field. Enter the number of days customers must order in advance. For instance, entering '3' means the order must be placed at least three days before the desired fulfillment date.
What is the difference between internal product notes and storefront descriptions in BakeOnyx?▾
Internal product notes in BakeOnyx are for your staff's reference, containing details relevant to production or inventory. Storefront descriptions, however, are specifically written for your customers. These are displayed on your online shop to entice buyers, providing appealing details about the product's taste, ingredients, or suitability for occasions.
Can I upload multiple photos for a single product in my BakeOnyx storefront?▾
Absolutely. BakeOnyx allows you to create a visual gallery for each product. In the product editing section, find the 'Product Images' area. You can upload multiple photos and then drag them to reorder them, ensuring your most appealing image is displayed as the main product photo on your online storefront.