Setting Up Your Online Store
Enable your public storefront and configure settings for your online bakery shop.

Setting Up Your Online Store
- Enable your public storefront so customers can browse and order online
- Configure your store name, description, and welcome message
- Choose display settings like pricing visibility and catalog layout
- Set up delivery options, deposits, and order limits
What You'll Need
To set up your online store, you'll need a BakeOnyx Professional+ plan. Your online store gives customers a dedicated URL where they can view your products, place orders, and complete checkout—all without needing to call or email.
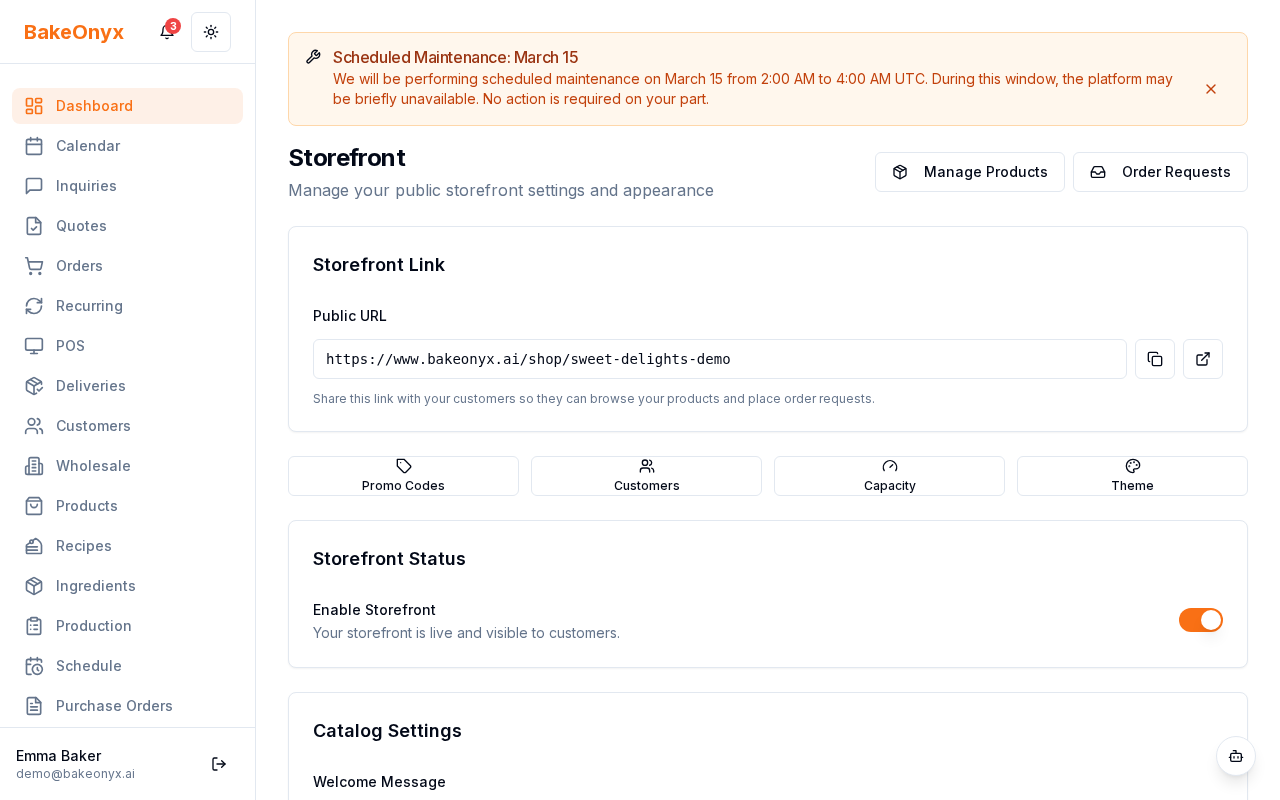
Enable Your Online Storefront
- From your BakeOnyx dashboard, click Settings in the left menu.
- Select Storefront from the settings options.
- Toggle Enable Public Storefront to the "on" position.
- Click Save.
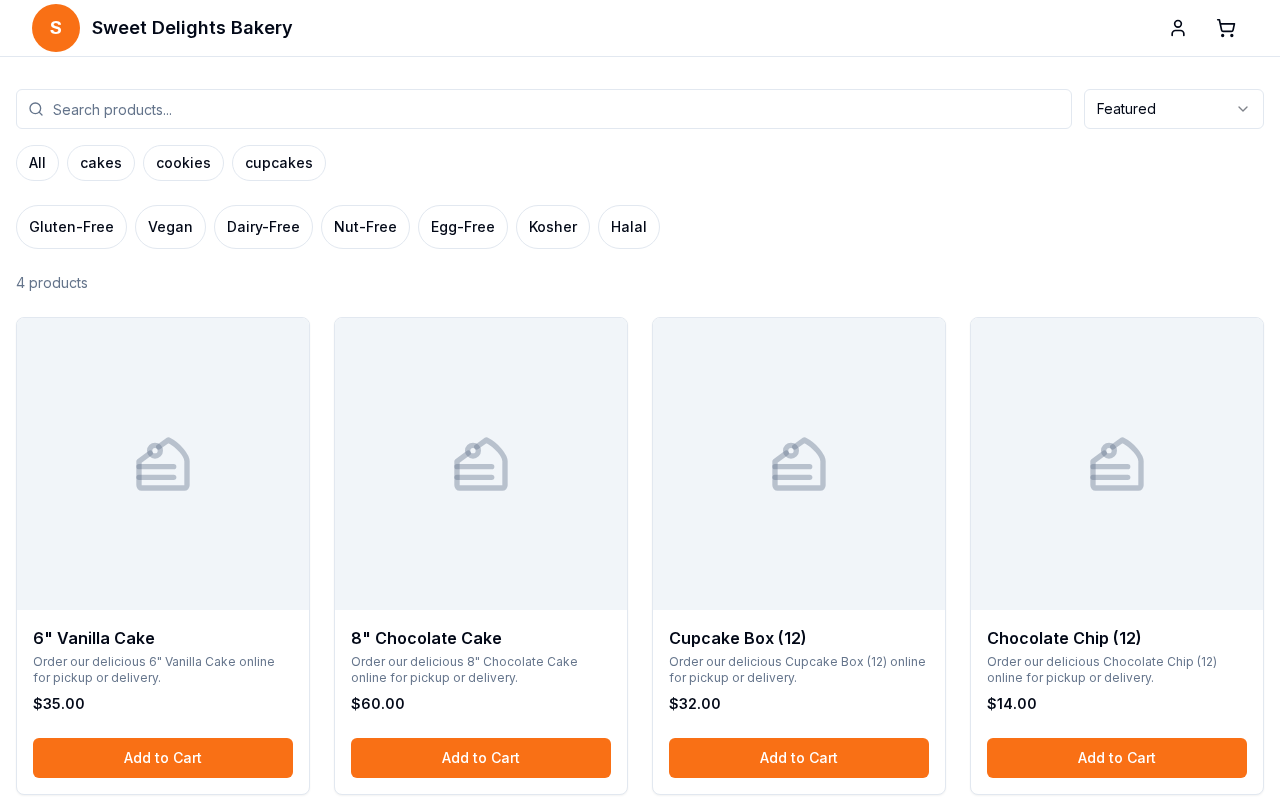
Once enabled, your online store will be live at a public URL. You'll see your unique store link displayed on the Storefront settings page—this is the URL you'll share with customers.
Configure Your Store Details
Store Name and Description
- In the Store Name field, enter your bakery's name as you'd like it to appear online.
- In the Store Description field, write a brief description of your bakery (50–150 words works well). This helps customers understand what you offer.
- In the Welcome Message field, add a greeting that appears at the top of your storefront. For example: "Welcome to Sweet Treats Bakery! Order fresh cakes, pastries, and custom designs."
Display Settings
Configure how your products and pricing appear to customers:
- Show Prices: Toggle on to display product prices. Toggle off if you prefer customers to request a quote.
- Catalog Layout: Choose between Grid (products displayed in boxes) or List (products displayed as rows). Grid layout is more visually appealing for bakeries.
- Customer Accounts: Enable customer accounts to let buyers create profiles, save favorites, and track order history. You can also allow guest checkout if you prefer.
Set Up Delivery and Payment Options
Delivery Methods
- Scroll to the Delivery Options section.
- Check the boxes for delivery methods you offer:
- Pickup: Customers collect orders from your location.
- Local Delivery: You deliver to customers within a set area.
- Shipping: Orders are shipped via mail or courier.
- For each method, set any applicable fees or minimum order amounts.
Deposits and Order Limits
- In the Deposit Percentage field, enter the percentage of the order total customers must pay upfront (e.g., 50 for 50%). This helps secure custom orders.
- Set your Maximum Daily Orders to prevent overbooking. For example, if you can fulfill 20 orders per day, enter 20.
- Set your Lead Time (in days) to specify how far in advance customers must order.
Choose Your Store Theme
- Scroll to the Theme section.
- Preview available themes by clicking on each option.
- Select the theme that best matches your bakery's brand.
- Click Save to apply your changes.
Next Steps
Now that your online store is set up, you're ready to:
The summary, FAQ, and statistics in this section were compiled from public sources and reviewed by the BakeOnyx editorial team. AI-assisted research.
Frequently Asked Questions
How do I enable my online storefront in BakeOnyx?▾
To enable your public storefront in BakeOnyx, navigate to 'Settings' from the main dashboard. Then, select 'Storefront' from the settings menu. Toggle the 'Enable Public Storefront' option to the 'on' position and click 'Save'. Your unique store URL will then be displayed on this page for sharing with customers.
What information should I include in my store description and welcome message?▾
Your store description should be a brief overview of your bakery, ideally between 50 and 150 words, highlighting what you offer. The welcome message is a greeting that appears at the top of your storefront. Use it to warmly welcome customers and perhaps mention signature items or current specials, like 'Welcome to Sweet Treats Bakery! Order fresh cakes and pastries.'
Can I choose how my products are displayed online?▾
Yes, BakeOnyx allows you to configure display settings for your online storefront. You can choose whether to show prices to customers or require them to request a quote. Additionally, you can select a 'Grid' layout for a visually appealing product display or a 'List' layout for a more traditional row-based view.
How do I set up delivery options for my online orders?▾
In the 'Storefront' settings, navigate to the 'Delivery Options' section. You can enable and configure 'Pickup', 'Local Delivery', and 'Shipping'. For each method selected, you can specify any associated fees or minimum order requirements to ensure smooth fulfillment of customer orders.
What is the purpose of setting a deposit percentage and maximum daily orders?▾
Setting a 'Deposit Percentage' in BakeOnyx helps secure custom orders by requiring customers to pay a portion upfront. The 'Maximum Daily Orders' setting prevents overbooking by limiting the number of orders you can accept per day, ensuring you can manage your production capacity effectively.