Point of Sale Overview
Learn how to use the POS screen for walk-in counter sales, browse products, and process quick orders.
Point of Sale Overview
The BakeOnyx Point of Sale (POS) screen is your command center for fast, efficient counter sales. Whether you're ringing up a customer's croissant and coffee or processing a bulk order for an event, the POS is designed to get you through transactions quickly with minimal clicks.
What you'll learn
- How to navigate the POS screen and find products quickly
- How to add items to a customer's order using the product grid
- How to search and filter products by category
Getting to the POS screen
To access the Point of Sale, navigate to the /pos URL in your browser, or tap the POS button from your BakeOnyx dashboard. The POS screen is optimized for tablet and iPad use, so it works best on larger touchscreens positioned at your counter or in the kitchen.
When you log in, the POS automatically displays your name in the header so customers and team members know who's handling the transaction.
Understanding the POS layout

The POS screen is split into two main sections:
- Product Grid (left side): Displays all your bakery items with photos, names, and prices in a touch-friendly layout
- Cart Panel (right side): Shows the current order, item quantities, and the running total
At the top of the screen, you'll see your name as the current cashier, along with search and filter options to help you find products fast.
Finding and adding products
Browse by category
- Look at the category filter buttons near the top of the product grid
- Tap a category (such as Bread, Pastries, or Cakes) to show only items in that category
- Scroll through the grid to see all available products
Search for a specific product
- Tap the Search field at the top of the POS screen
- Type the product name (for example, "sourdough" or "chocolate croissant")
- The product grid updates instantly to show matching items
- Tap the product you want to add
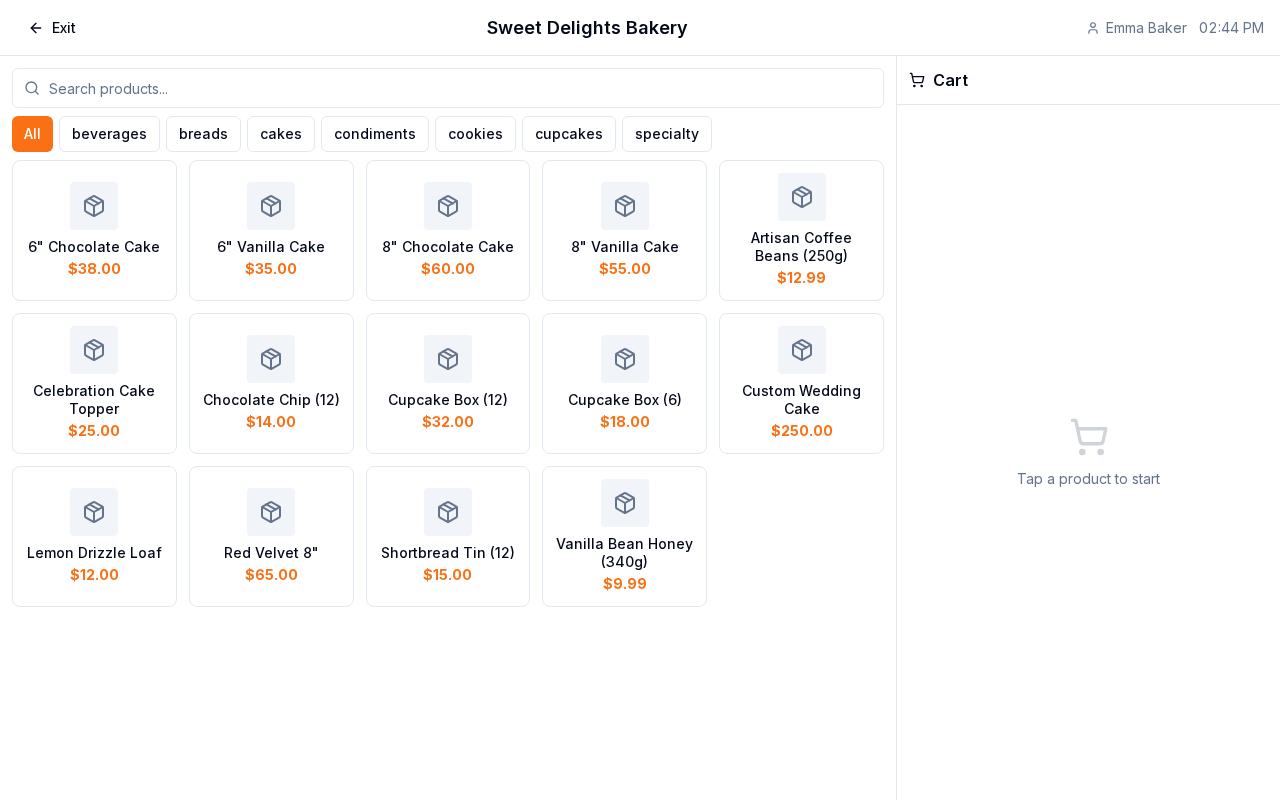
Add items to the cart
- Tap any product tile in the grid
- The item is added to the cart on the right side
- If the customer wants multiple of the same item, tap it again to increase the quantity, or use the quantity controls in the cart
- Repeat for each item in the order
Managing the current order
As you add items, the cart panel on the right tracks everything:
- Each product appears as a line item with quantity and price
- The subtotal and total update automatically
- You can adjust quantities directly in the cart by tapping the + or − buttons
- To remove an item, tap the Remove or trash icon next to it
Before you check out
Once you've added all items to the cart, you're ready to proceed to payment. The POS is designed to handle the entire transaction—from product selection to final payment—in one streamlined workflow.
Next steps
- POS Checkout and Payments — Learn how to complete the sale and process customer payments
- Creating a New Order — Understand how orders work in BakeOnyx
- Creating a Recipe — Add new bakery items to your POS product grid
The summary, FAQ, and statistics in this section were compiled from public sources and reviewed by the BakeOnyx editorial team. AI-assisted research.
Frequently Asked Questions
How do I access the Point of Sale screen in BakeOnyx?▾
You can access the BakeOnyx Point of Sale (POS) screen by navigating to the /pos URL in your web browser. Alternatively, you can tap the dedicated 'POS' button directly from your BakeOnyx dashboard. The POS is optimized for tablet and iPad use, making it ideal for counter or kitchen placement on larger touchscreens.
What are the main sections of the BakeOnyx POS screen?▾
The BakeOnyx POS screen is divided into two primary sections. On the left is the 'Product Grid,' which displays all your bakery items with images, names, and prices in a touch-optimized layout. On the right is the 'Cart Panel,' where the current customer order is listed, showing item quantities and the running total.
How can I quickly find products on the BakeOnyx POS?▾
You can find products on the BakeOnyx POS in two main ways. Use the category filter buttons at the top of the product grid to display only items from specific categories like 'Bread' or 'Pastries.' For specific items, tap the 'Search' field at the top and type the product name; the grid will update instantly to show matching results.
How do I add items to a customer's order using the POS?▾
To add items, simply tap any product tile in the product grid. The selected item will be added to the cart panel on the right. If a customer wants multiple of the same item, you can tap the product again to increase its quantity or use the '+' and '-' controls within the cart panel itself.
How do I manage items already added to the current order?▾
The cart panel on the right side of the BakeOnyx POS screen allows for easy order management. You can adjust the quantity of any item by tapping the '+' or '-' buttons next to it. To remove an item entirely from the order, tap the 'Remove' or trash icon associated with that line item.
What happens to an order when I process it in the BakeOnyx POS?▾
Every transaction processed through the BakeOnyx POS is automatically created as an order for a 'Walk-in Customer.' These orders are assigned an immediate fulfillment status, meaning they are marked as delivered as soon as the transaction is completed, simplifying the checkout process for counter sales.