Accounting Integration (QuickBooks & Xero)
Connect BakeOnyx to QuickBooks or Xero for automatic invoice and expense syncing.
Accounting Integration (QuickBooks & Xero)
Connect BakeOnyx to your accounting software so that invoices, payments, and expenses sync automatically. This saves you time on double-entry and keeps your financial records accurate across both systems.
- Connect BakeOnyx to QuickBooks Online or Xero with a few clicks
- Automatically sync invoices when you send them, payments when you receive them, and expenses when you log them
- Link your BakeOnyx product and expense categories to your accounting software accounts
Before You Start
Accounting integration is available on the Starter plan and above. You'll need:
- An active QuickBooks Online or Xero account
- Admin access to both BakeOnyx and your accounting software
- A few minutes to authorize the connection
Step 1: Open Accounting Settings
- Log in to BakeOnyx and go to Dashboard
- Click Settings in the left sidebar
- Select Accounting Integration
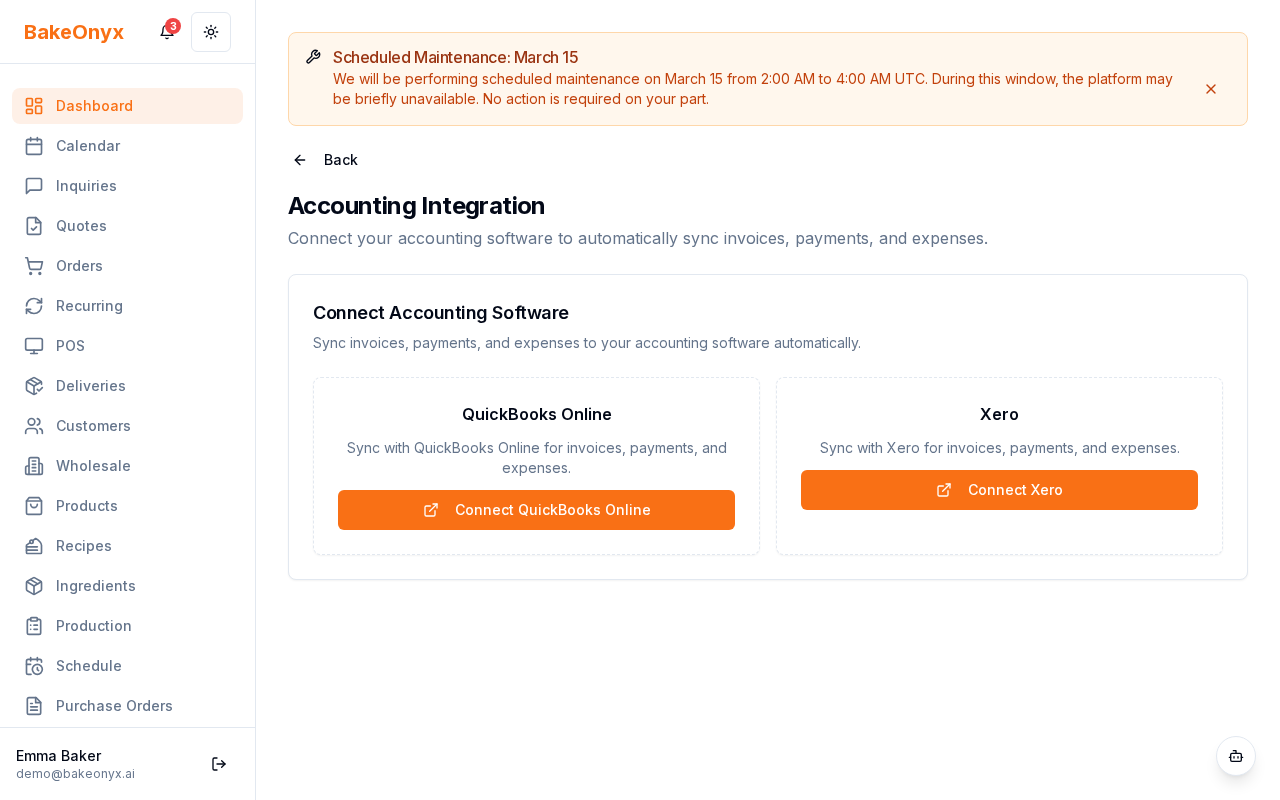
Step 2: Connect Your Accounting Software
Choose which accounting platform you use:
For QuickBooks Online:
- Click Connect to QuickBooks
- You'll be taken to QuickBooks to authorize BakeOnyx
- Log in with your QuickBooks admin account if prompted
- Review the permissions BakeOnyx is requesting (invoices, expenses, and payments)
- Click Authorize
- You'll be returned to BakeOnyx with a confirmation message
For Xero:
- Click Connect to Xero
- You'll be taken to Xero to authorize BakeOnyx
- Log in with your Xero admin account if prompted
- Review the permissions and click Authorize
- You'll be returned to BakeOnyx with a confirmation message
Step 3: Map Your Categories
After connecting, you need to tell BakeOnyx which of your accounting accounts to use for different types of transactions.
- In the Accounting Integration settings, find the Category Mapping section
- For each BakeOnyx product category (e.g., "Cakes," "Bread," "Custom Orders"), select the matching account from your accounting software
- Do the same for expense categories (e.g., "Ingredients," "Labor," "Supplies")
- Click Save Mapping
What Syncs Automatically
Once connected, BakeOnyx will automatically sync:
- Invoices: When you send an invoice to a customer, it syncs to your accounting software as a sales invoice
- Payments: When you record a payment from a customer, it syncs as a payment against that invoice
- Expenses: When you log an expense (ingredients, supplies, labor), it syncs to your accounting software
All syncs happen in the background. You don't need to do anything—just work as you normally would in BakeOnyx.
Checking Sync Status
To see if a transaction synced successfully:
- Open the invoice, payment, or expense record
- Look for the Sync Status indicator (usually shown as a small icon or label)
- Status will show as Synced, Pending, or Failed
- If a sync failed, BakeOnyx will show an error message. You can retry the sync or contact support
Disconnecting Your Account
If you need to disconnect from QuickBooks or Xero:
- Go to Settings → Accounting Integration
- Click Disconnect next to the connected software
- Confirm the disconnection
Existing synced data will remain in your accounting software, but new transactions won't sync until you reconnect.
Next Steps
- Business Profile Settings — Set up your bakery details for invoices and reports
- Using the Calendar — Manage your orders and production schedule
- Production Scheduler Overview — Plan your daily baking and track costs
Tax-Inclusive Pricing and Your Accounting System
If your bakery uses tax-inclusive pricing (Settings → Orders → Prices include VAT / sales tax enabled), BakeOnyx tells your accounting system to treat the amounts it pushes as tax-inclusive:
- Xero receives
LineAmountTypes: 'Inclusive'on each sales invoice, so Xero extracts VAT from the line amounts instead of adding it on top - QuickBooks receives
GlobalTaxCalculation: 'TaxInclusive'on each invoice for the same reason
This is handled automatically — you don't need to change any accounting settings. For full EU VAT compliance in Xero or QuickBooks, you may still want to map your income account to the correct tax code on the accounting side (e.g., "OUTPUT2" for UK standard VAT in Xero, or the appropriate tax rate in QuickBooks).
The summary, FAQ, and statistics in this section were compiled from public sources and reviewed by the BakeOnyx editorial team. AI-assisted research.
Frequently Asked Questions
What accounting software does BakeOnyx integrate with?▾
BakeOnyx integrates with cloud-based accounting platforms, specifically QuickBooks Online and Xero. Desktop versions of QuickBooks are not compatible with the BakeOnyx integration. This allows bakeries to connect their financial data for automatic syncing of invoices, payments, and expenses.
How does BakeOnyx ensure the security of my accounting data?▾
The connection between BakeOnyx and your accounting software is encrypted and secure. BakeOnyx does not store your login credentials. Instead, it uses a secure token to authorize data syncing on your behalf, ensuring that your financial information remains protected.
What information is automatically synced between BakeOnyx and my accounting software?▾
Once connected, BakeOnyx automatically syncs invoices when sent to customers, payments when received, and logged expenses such as ingredients, supplies, and labor. This ensures that your financial records are consistently updated across both platforms without manual intervention.
What do I need to set up accounting integration in BakeOnyx?▾
To set up accounting integration in BakeOnyx, you need to be on the Starter plan or higher. You'll also require an active QuickBooks Online or Xero account, administrative access to both BakeOnyx and your accounting software, and a few minutes to authorize the connection.
What happens if I don't map my categories in BakeOnyx?▾
If you do not map your BakeOnyx product and expense categories to corresponding accounts in your accounting software, transactions within those unmapped categories will not sync. It is crucial to review and complete category mapping to ensure all relevant financial data is transferred accurately.