Business Profile Settings
Update your bakery name, address, logo, timezone, and currency settings.
Business Profile Settings
What you'll learn
- How to update your bakery's basic information (name, address, contact details)
- How to upload and manage your bakery logo
- How to set your timezone and currency for accurate scheduling and financial reporting
Overview
Your business profile is the foundation of your BakeOnyx account. It contains all the essential information about your bakery — from your name and address to your timezone and currency. These settings affect how BakeOnyx displays information across your dashboard, how your team sees greeting times in Bake Buddy, and how all financial data is calculated and displayed.
You'll only need to set up your business profile once, but you can update it anytime if your bakery's details change.
Accessing Your Business Profile
- Log in to your BakeOnyx dashboard.
- Click the Settings icon in the left sidebar (gear icon).
- Select Business Profile from the settings menu.
Updating Basic Bakery Information
- In the Bakery Name field, enter the name of your bakery as you'd like it to appear in BakeOnyx and on reports.
- Select your Business Type from the dropdown menu (e.g., Artisan Bakery, Cafe Bakery, Industrial Bakery, etc.).
- Enter your bakery's Phone number in the format shown.
- Enter your Email address — this is used for important account notifications.
- Optionally, add your bakery's Website URL if you have one.
Adding Your Address
- Fill in the Street Address field with your bakery's street location.
- Enter your City.
- Enter your State (or province, depending on your country).
- Enter your ZIP Code (or postal code).
- Select your Country from the dropdown menu.
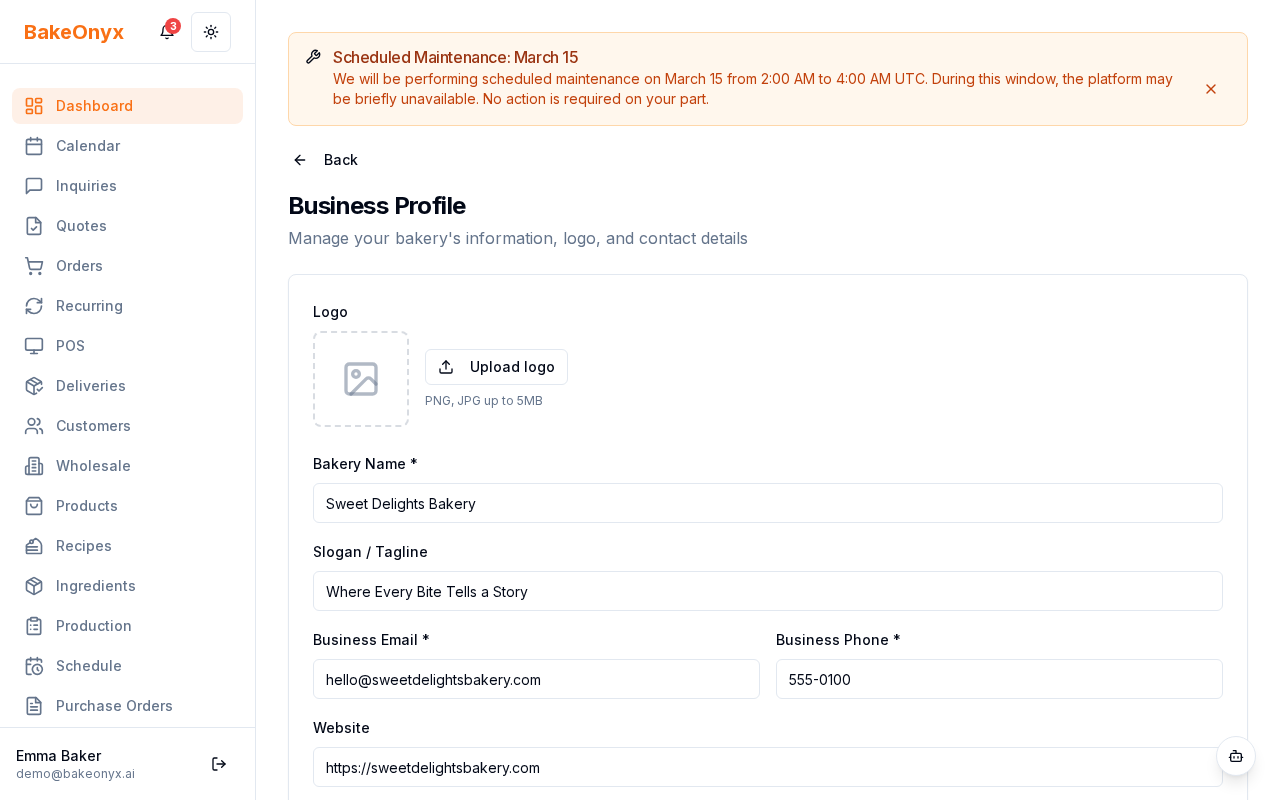
Uploading Your Logo
- Click the Logo Upload area or the upload button.
- Select an image file from your computer (PNG, JPG, or GIF formats work best).
- Your logo will appear in reports, invoices, and team-facing areas of BakeOnyx.
- To replace your logo, click the upload area again and select a new image.
Setting Your Timezone
- Click the Timezone dropdown menu.
- Search for your timezone by city name or region (e.g., "New York," "London," "Sydney").
- Select your timezone from the list.
Your timezone affects when Bake Buddy sends morning briefings and how all time-based features in BakeOnyx calculate schedules. For example, if you're in Eastern Time and set your timezone correctly, Bake Buddy will greet your team at the right time in the morning.
Selecting Your Currency
- Click the Currency dropdown menu.
- Search for or select your currency (e.g., USD, EUR, GBP, CAD).
- Click to confirm your selection.
Your currency setting is used across all financial displays in BakeOnyx — including invoices, reports, pricing, and cost calculations. It also affects how AI features like Bake Buddy format financial information and recommendations.
Saving Your Changes
- Review all the information you've entered.
- Click the Save Changes button at the bottom of the page.
- You'll see a confirmation message when your business profile has been updated successfully.
Next steps
- Team Management and Roles — Add team members and assign permissions.
- Welcome to BakeOnyx — Get oriented with the platform's main features.
- Understanding Subscription Plans — Learn about billing and plan options.
The summary, FAQ, and statistics in this section were compiled from public sources and reviewed by the BakeOnyx editorial team. AI-assisted research.
Frequently Asked Questions
Why is setting the correct timezone important in BakeOnyx?▾
Setting the correct timezone in BakeOnyx is vital for accurate scheduling and timely communication. It ensures that features like the Bake Buddy morning briefing are sent out at the appropriate local time for your team. This also impacts how all time-based calculations and reports are generated within the platform, ensuring consistency with your operational hours.
What kind of image file should I use for my bakery logo in BakeOnyx?▾
For optimal results when uploading your bakery logo to BakeOnyx, it is recommended to use a square image with a 1:1 aspect ratio, at least 200x200 pixels. PNG, JPG, or GIF formats are supported. BakeOnyx will automatically resize your logo for various uses across the platform, including reports and invoices.
How does BakeOnyx use my bakery's address information?▾
BakeOnyx utilizes your bakery's address for several key functions. It is used for accurate delivery route planning, ensuring efficient logistics for your orders. Additionally, the address is leveraged for location-based features within the platform, helping to tailor services and reporting to your specific geographical area.
Can I change my bakery's basic information after setting it up in BakeOnyx?▾
Yes, you can update your bakery's basic information at any time within BakeOnyx. While the business profile is typically set up once, the system allows for modifications if your bakery's name, address, contact details, or other essential information changes. This ensures your BakeOnyx account always reflects your current business details.
What is the purpose of setting the currency in BakeOnyx?▾
Setting the correct currency in BakeOnyx is essential for accurate financial reporting and management. It dictates the currency symbol and format used across all financial transactions, invoices, and reports generated within the platform. This ensures that your financial data is presented clearly and correctly according to your local economic standards.