Setting Up Recurring Orders
Create recurring order templates for customers who order on a regular schedule.
Setting Up Recurring Orders
Recurring orders save time and help you build reliable revenue with customers who order the same items on a regular schedule. Instead of manually creating an order every week or month, set up a template once and let BakeOnyx handle the rest.

- Create order templates for regular customers with automatic scheduling
- Set frequency (daily, weekly, biweekly, or monthly) and customize delivery dates
- Pause, resume, or cancel recurring orders anytime without losing the template
Before You Start
Make sure you have:
- A BakeOnyx Professional+ plan (recurring orders are not available on Starter)
- At least one customer already set up in your system
- The items (products) you want to include in the recurring order already created
How to Create a Recurring Order Template
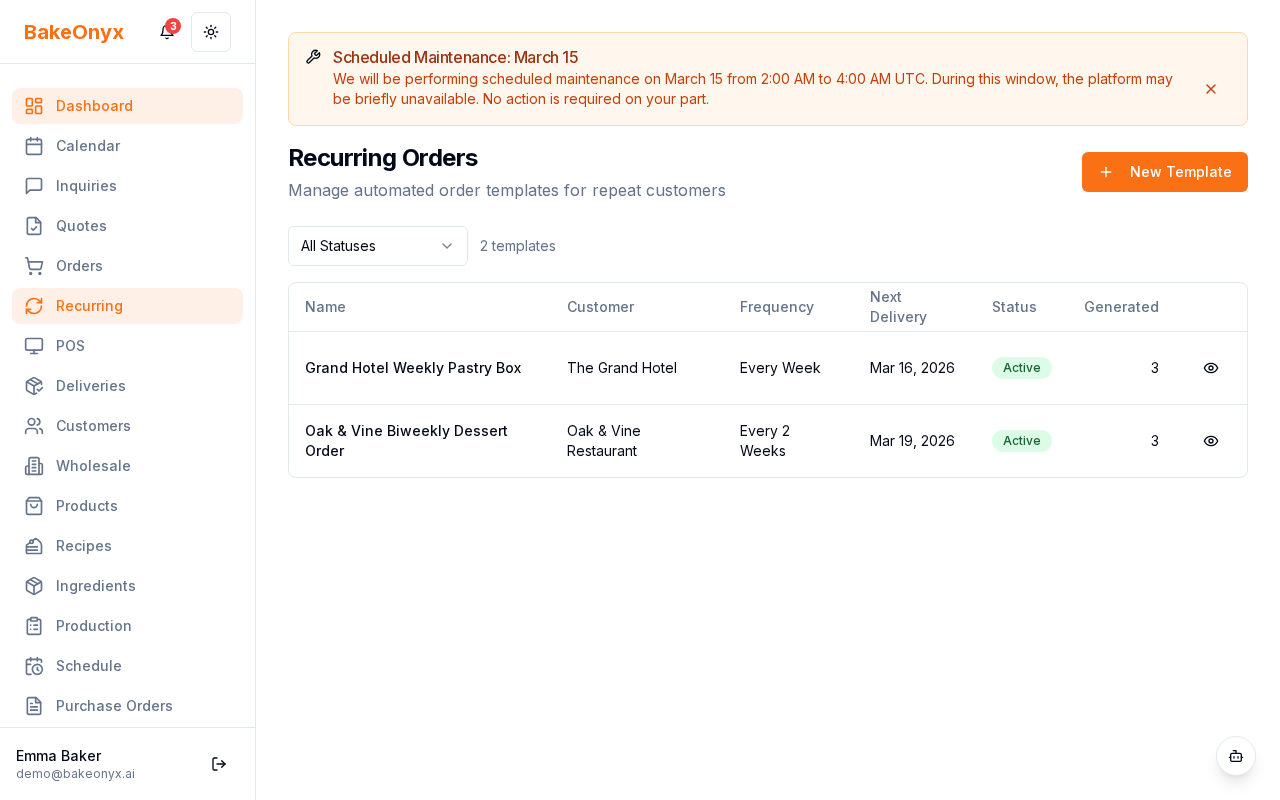
- From your BakeOnyx dashboard, click Orders in the main menu, then select Recurring Orders.
- Click the + New Recurring Order button in the top right.
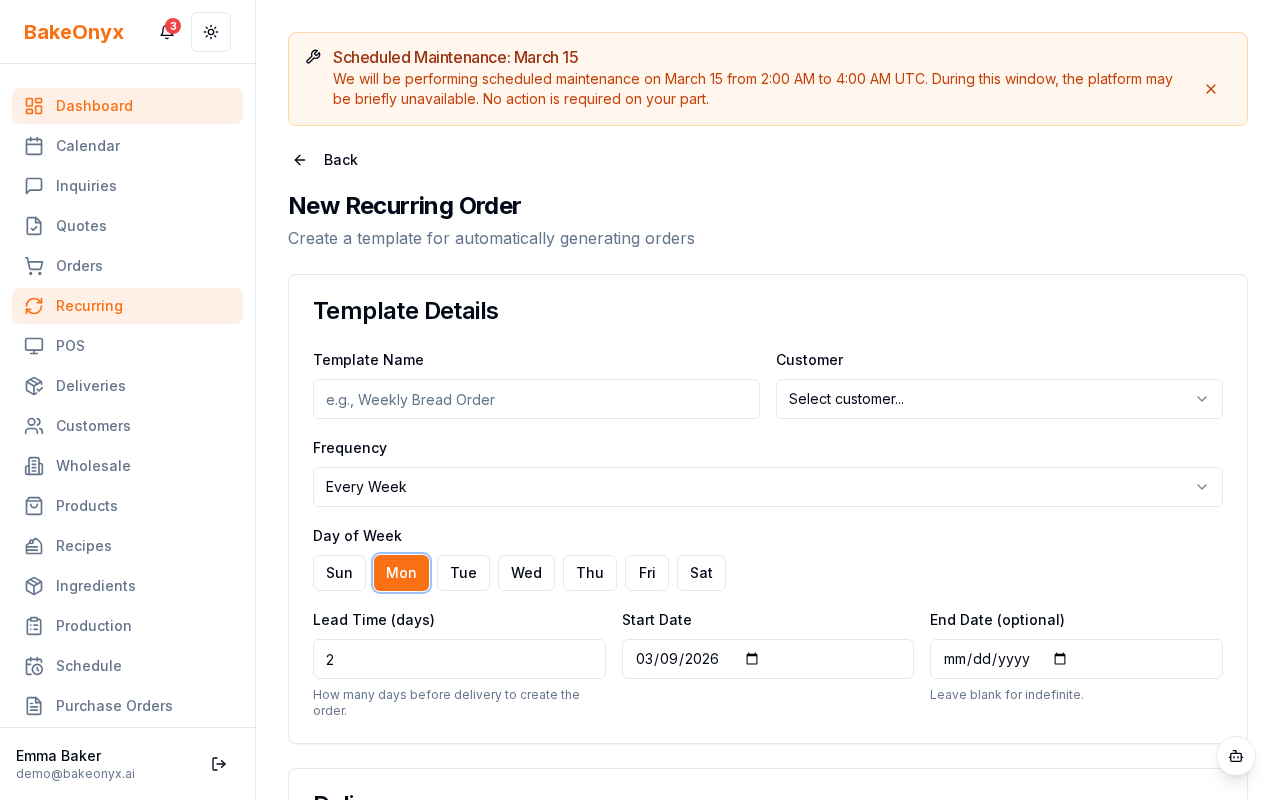
- Fill in the template details:
- Customer: Search for and select the customer who will receive this recurring order.
- Order Name/Description: Give this template a clear name, like "Weekly Sourdough - Monday" or "Monthly Corporate Cake Order." This helps you identify it quickly in your list.
- Set the frequency:
- Choose a frequency type: Daily, Weekly, Biweekly, or Monthly.
- If you select Weekly, pick the day of the week (e.g., Monday, Wednesday).
- If you select Monthly, pick the day of the month (e.g., the 15th).
- Daily and Biweekly orders don't require additional configuration.
- Set start and end dates:
- Start Date: The date when the first order in this series should be generated.
- End Date (optional): If this order should stop after a certain date, enter it here. Leave blank if the order should continue indefinitely.
- Enter the Lead Time in Days: This tells BakeOnyx how many days before delivery you need to prepare the order. For example, if a customer receives their order every Monday and you need 3 days to prepare, enter 3. BakeOnyx will automatically create the order on Friday.
- Select the Delivery Method: Choose how this customer will receive their order (e.g., Pickup, Local Delivery, Shipping).
- Add items to the order:
- Click + Add Item to include products in this recurring order.
- Search for the product, select it, and enter the quantity.
- Add as many items as needed for a complete order.
- Review all details and click Save Recurring Order.
Managing Your Recurring Orders
Once your template is created, you'll see it listed on the Recurring Orders page with a status badge (Active, Paused, Completed, or Cancelled).
Next Steps
- Managing Recurring Orders — Learn how to pause, resume, edit, or cancel recurring order templates.
- Managing Customers — Add new customers or update existing customer information.
- Creating a Recipe — Set up products to include in your recurring orders.
Tax on Recurring Orders
When a recurring template generates a new order, BakeOnyx respects your bakery's tax settings. If Prices include VAT / sales tax is enabled under Settings → Orders, generated recurring orders will automatically extract VAT using your default tax rate — no extra configuration needed per template.
The summary, FAQ, and statistics in this section were compiled from public sources and reviewed by the BakeOnyx editorial team. AI-assisted research.
Frequently Asked Questions
What is the benefit of using recurring orders in BakeOnyx?▾
Recurring orders in BakeOnyx automate the process of fulfilling regular customer orders, saving significant time and effort. By setting up a template once, bakeries can ensure consistent revenue streams from customers who order the same items on a predictable schedule. This feature eliminates the need for manual order creation each cycle and helps manage inventory and production more effectively.
Which BakeOnyx plans support the recurring orders feature?▾
The recurring orders feature is available on the BakeOnyx Professional+ plan. It is not included in the Starter plan. Customers on the Professional+ plan can leverage this functionality to build more predictable revenue and streamline operations by setting up automated order schedules for their clients.
Can I pause or cancel a recurring order template in BakeOnyx?▾
Yes, you can easily manage your recurring orders within BakeOnyx. The platform allows you to pause, resume, or cancel recurring order templates at any time without losing the established template details. This flexibility ensures you can adapt to changing customer needs or business requirements seamlessly.
How does BakeOnyx determine when to create a recurring order?▾
BakeOnyx determines when to create a recurring order based on the 'Lead Time in Days' you set in the template. This setting indicates how many days before the actual delivery date the order needs to be prepared. For instance, if an order is due on Monday and you set a 3-day lead time, BakeOnyx will automatically generate the order on the preceding Friday.
What information do I need before setting up a recurring order in BakeOnyx?▾
Before creating a recurring order in BakeOnyx, ensure you have a BakeOnyx Professional+ plan. You also need to have at least one customer already set up in your system and all the products (items) you intend to include in the recurring order created within the platform. This ensures all necessary components are in place for seamless setup.