Email Settings
Configure your email sender name, reply-to address, and CC/BCC preferences for outgoing emails.
Email Settings
What you'll learn
- How to set your bakery's sender name for customer emails
- How to configure where customer replies are directed
- How to add optional CC, BCC, and email footer text to all outgoing messages
Overview
Email settings control how your bakery appears in every message BakeOnyx sends to customers—from order confirmations to delivery reminders. You can customize the sender name, set up a reply-to address, and add optional copies or footer text. These settings apply to all system-generated emails automatically.
Accessing your email settings
- Log in to BakeOnyx and go to your dashboard.
- Click Settings in the left sidebar.
- Select Email Settings from the menu.
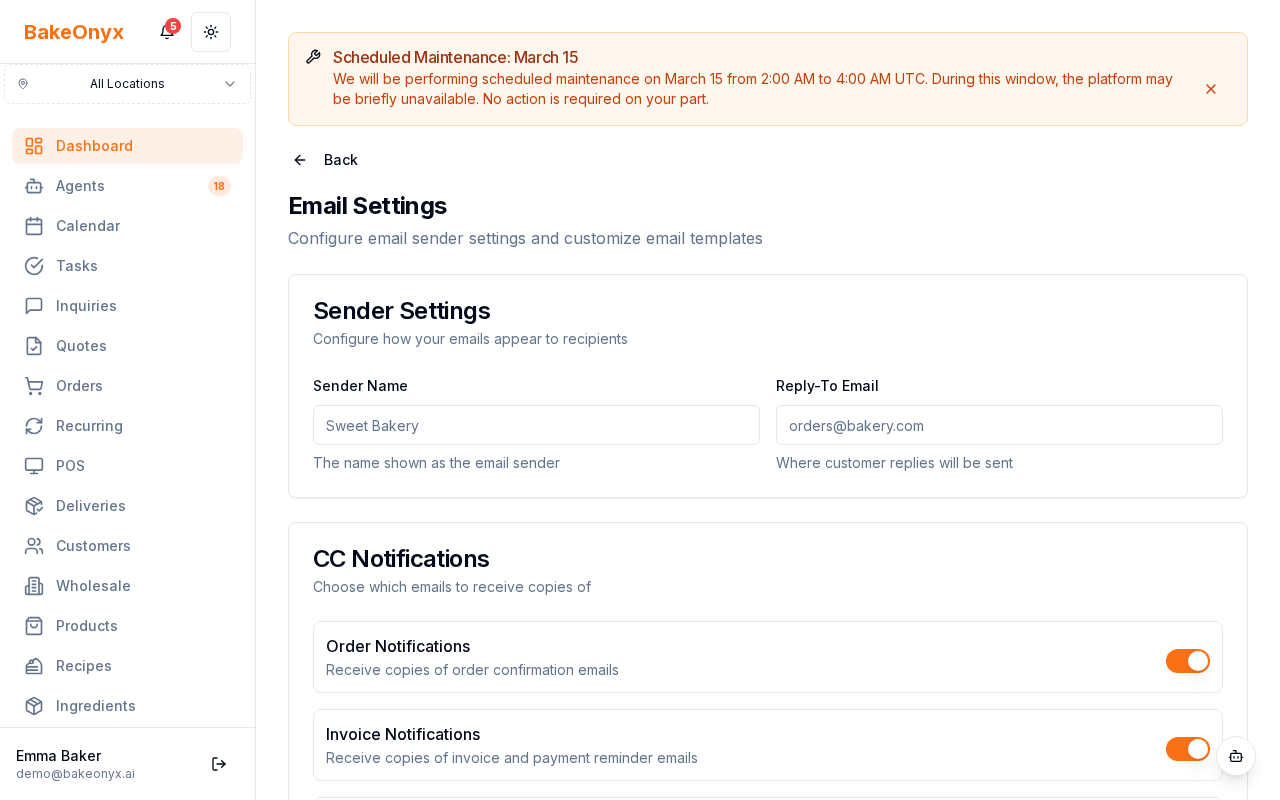
Configuring your sender name
The sender name is what appears in the "From" field when customers receive emails from your bakery. This is typically your bakery's name.
- In the Sender Name field, enter the name you want customers to see (for example, "Sweet Delights Bakery" or "The Cake Studio").
- Click Save to apply the change.
Setting your reply-to address
The reply-to address is where customer responses go when they hit "Reply" on an email from BakeOnyx. This should be an email address you check regularly—typically your main business email or a shared team inbox.
- In the Reply-To Email field, enter the email address where you want customer replies to arrive.
- Click Save.
noreply@bakeonyx.ai), but replies always go to your reply-to address. This keeps your customer conversations in one place while protecting your primary email from being exposed in customer inboxes.Adding optional CC and BCC addresses
CC (carbon copy) and BCC (blind carbon copy) let you receive copies of every outgoing email automatically. Use these if you want a manager, team member, or archive inbox to track all customer communications.
CC address
- In the CC Email field, enter an email address (optional).
- This person will receive a visible copy of every email sent to customers.
- Click Save.
BCC address
- In the BCC Email field, enter an email address (optional).
- This person will receive a hidden copy—customers won't see this address.
- Click Save.
Adding an email footer
The email footer appears at the bottom of every outgoing message. Use it to include your bakery's contact information, website, social media links, or business hours.
- Click in the Email Footer text field.
- Type any text you'd like to appear at the end of all emails (for example: "Thank you for your order! Call us at (555) 123-4567 or visit www.yourbakery.com").
- Click Save.
Emails affected by these settings
Your email settings apply to all system-generated messages, including:
- Order confirmations
- Invoice emails
- Delivery reminders
- Payment receipts
- Review requests
- Welcome emails
Next steps
- Customer Notification Preferences – Control which emails customers receive and when.
- Welcome to BakeOnyx – Learn the basics of setting up your account.
- Understanding Subscription Plans – Review what features are available on your plan.
The summary, FAQ, and statistics in this section were compiled from public sources and reviewed by the BakeOnyx editorial team. AI-assisted research.
Frequently Asked Questions
How do I change the sender name for emails sent by BakeOnyx?▾
To change your bakery's sender name in BakeOnyx, log in to your dashboard, navigate to 'Settings' in the left sidebar, and then select 'Email Settings.' In the 'Sender Name' field, enter your desired bakery name, such as 'Sweet Delights Bakery,' and click 'Save' to apply the changes. This ensures customers easily recognize who the email is from.
Where do customer replies go when using BakeOnyx?▾
Customer replies to emails sent through BakeOnyx are directed to the email address you specify in the 'Reply-To Email' field within your Email Settings. While BakeOnyx sends the emails from a platform address (noreply@bakeonyx.ai), setting a custom reply-to address ensures all customer responses are consolidated in your chosen inbox, like your main business email or a team alias.
Can I add a custom footer to all bakery emails sent via BakeOnyx?▾
Yes, BakeOnyx enables you to add a custom email footer that will appear at the bottom of all outgoing messages. Access this by going to 'Settings' > 'Email Settings.' In the 'Email Footer' text field, you can input important information such as your bakery's contact number, website URL, social media links, or operating hours to keep customers informed.
What is the purpose of CC and BCC fields in BakeOnyx email settings?▾
The CC (carbon copy) and BCC (blind carbon copy) fields in BakeOnyx's email settings allow you to automatically send copies of outgoing customer emails to other email addresses. The CC address receives a visible copy, while the BCC address receives a hidden copy. These are useful for internal archiving, team oversight, or ensuring specific personnel are aware of all customer communications.
How does BakeOnyx handle the 'From' address for customer emails?▾
BakeOnyx sends emails to customers using a dedicated platform address, such as 'noreply@bakeonyx.ai.' However, you can customize the 'Sender Name' that appears in the 'From' field to be your bakery's name, like 'The Cake Studio.' This makes the communication instantly recognizable to your customers while maintaining the integrity of the sending infrastructure.