Email Templates
Customize the email templates sent to customers for order confirmations, invoices, and more.
Email Templates
- How to customize email templates for order confirmations, invoices, and other customer communications
- How to use merge fields to personalize emails with customer and order details
- Best practices for keeping your email tone consistent with your bakery's brand
What Are Email Templates?
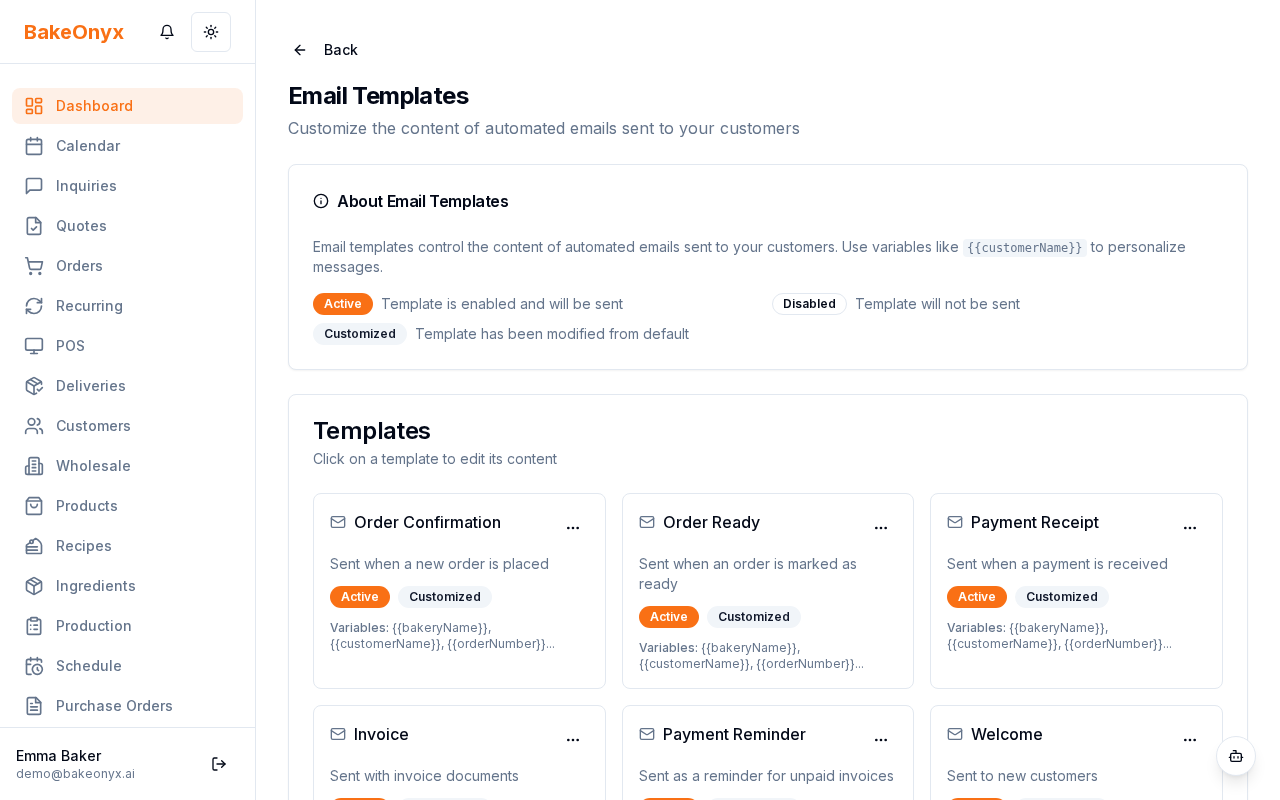
BakeOnyx sends automated emails to your customers at key moments in their journey—from order confirmation to delivery reminders and review requests. Email templates let you customize the subject line and message body for each of these communications, so they sound like your bakery, not a generic system.
You have 6 default templates to work with:
- Order Confirmation — Sent when a customer places an order
- Invoice — Sent with payment details and order summary
- Payment Receipt — Sent after payment is successfully processed
- Delivery Reminder — Sent before the scheduled delivery or pickup date
- Review Request — Sent after delivery to ask for customer feedback
- Welcome — Sent to new customers when they sign up
How to Access Email Templates
- Log in to your BakeOnyx dashboard
- Click Settings in the left sidebar
- Select Email Templates from the settings menu
You'll see a list of all 6 default templates. Each one is ready to customize.
How to Customize a Template
- From the email templates list, click the template you want to edit (for example, Order Confirmation)
- The template editor opens. You'll see two fields:
- Subject Line — The email's subject that appears in the customer's inbox
- Email Body — The main message content in HTML format
- Click into the Subject Line field and update the text to match your bakery's voice. For example: "Your Sweet Order is Confirmed! 🎂" instead of the generic default
- Click into the Email Body field to edit the message. You can:
- Change the greeting, tone, and closing
- Add bakery-specific details like your phone number, website, or social media links
- Reorganize sections to highlight what matters most to your customers
- Click Save when you're done
Using Merge Fields to Personalize Emails
Merge fields are placeholders that automatically pull in customer and order details when the email is sent. They look like {{customer_name}} or {{order_number}}.
Common merge fields include:
{{customer_name}}— Customer's full name{{order_number}}— Unique order ID{{order_date}}— Date the order was placed{{delivery_date}}— Scheduled delivery or pickup date{{order_total}}— Total order amount{{bakery_name}}— Your bakery's name
When you edit a template, a list of available merge fields appears in the editor. Click any merge field to insert it into your subject line or body text. The system will automatically replace it with the correct information when the email is sent.
Best Practices for Email Templates
- Keep it short and scannable. Customers often read emails on their phones. Use short paragraphs and bullet points
- Include a clear call-to-action. Whether it's "Confirm your delivery date" or "Leave a review," tell customers what to do next
- Add your bakery's contact info. Include your phone number, email, and website so customers can reach you easily
- Test before going live. Send yourself a test email to see how it looks and verify merge fields are working correctly
{{order_number}} from an invoice template could confuse customers about which order they're paying for.Next Steps
- Learn how to manage Lists of Values (LOVs) for other customizable settings
- Get started with Welcome to BakeOnyx for an overview of the platform
- Review your subscription plan to see which features are available to you
The summary, FAQ, and statistics in this section were compiled from public sources and reviewed by the BakeOnyx editorial team. AI-assisted research.
Frequently Asked Questions
What types of emails can I customize with BakeOnyx templates?▾
BakeOnyx provides six default email templates that you can customize. These include Order Confirmation, Invoice, Payment Receipt, Delivery Reminder, Review Request, and Welcome emails. This allows you to tailor every automated customer communication to reflect your bakery's unique brand voice and provide relevant details.
How do I personalize emails sent through BakeOnyx?▾
You can personalize emails using merge fields within the BakeOnyx template editor. These placeholders, such as {{customer_name}} or {{order_number}}, automatically insert specific customer and order information when the email is sent. This makes communications feel more individual and relevant to each recipient.
Where can I find and edit email templates in BakeOnyx?▾
To access and edit your email templates, log in to your BakeOnyx dashboard. Navigate to the 'Settings' section in the left sidebar, and then select 'Email Templates' from the menu. You will see a list of all available default templates ready for customization.
What are merge fields and how do they work in BakeOnyx?▾
Merge fields are dynamic placeholders within your email templates that automatically populate with specific data. For example, {{customer_name}} will be replaced by the customer's actual name. BakeOnyx provides a list of common merge fields like order details, dates, and your bakery's name within the editor.
Can I change the tone and content of the default email templates?▾
Yes, you can significantly change the tone and content of BakeOnyx's default email templates. You can edit both the subject line and the email body. This allows you to adjust greetings, add specific bakery information, include calls to action, and ensure the messaging aligns perfectly with your brand.